Refresh Token Support in OAuth2 + OIDC Debugger

This post describes the Refresh Token support that was added to the OAuth2 + OIDC Debugger in late 2017. The OAuth2 + OIDC Debugger is a general-purpose testing tool for the OAuth2 and OpenID Connect protocols. It has been tested with many of the leading Identity Providers in the industry.
The theory discussion surround OpenID Connect and OAuth2 can be found in previous posts.
- Configure an OAuth2 or OIDC-compliant Identity Provider (note, that “http://localhost:3000” must be a registered Redirect URL for the client):
* Configure Azure Active Directory similar to what is described here for a Client that uses OpenID Connect.
* OR, Configure Red Hat SSO similar to what is described here for a Client that uses OpenID Connect.
* OR, configure your favorite IdP with a client that will work with OpenID Connect and the OIDC Authorization Code Flow.
- Record the following parameters for your client (you will need these values a little later):
Authorization Endpoint
Token Endpoint
Does the Token Endpoint use a publically signed certificate?
Client identifier
Client secret
Scope (use “openid profile”, if no other requirements are present)
Test user name
Test user password
- Follow the instructions here to setup and start the OAuth2 + OIDC Debugger app on your local machine. This is a simple test application that simulates the interaction between a real app and an IdP using the OAuth2 or OIDC protocols.
- Open your favorite browser.
- Go to http://localhost:3000
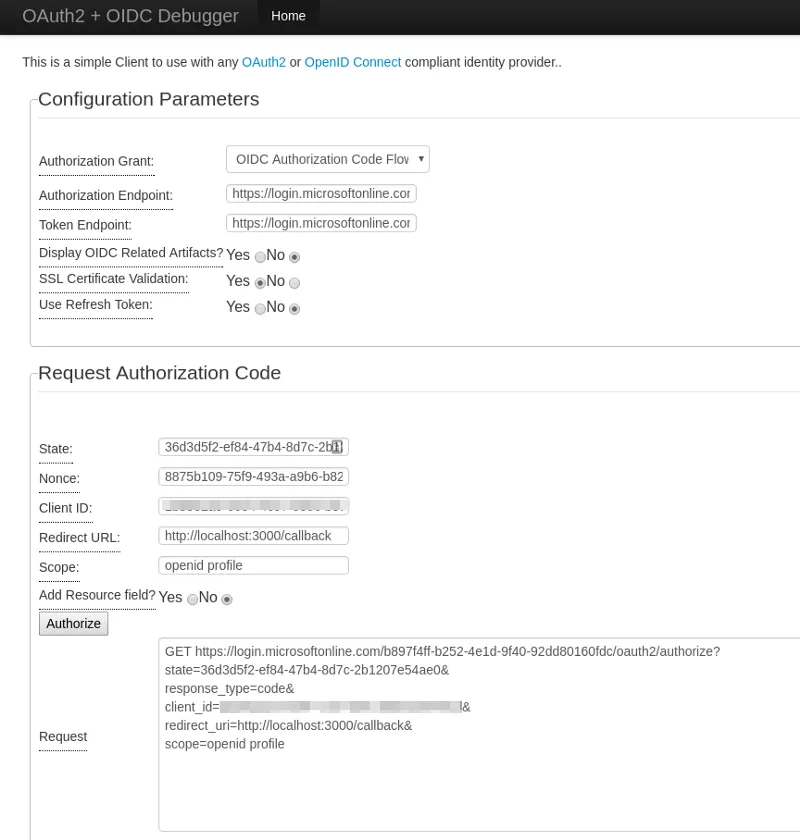
- Under the Configuration Parameters section,
Choose OIDC Authorization Code Flow from the Authorization Grant drop-down menu.
Put your IdP’s Authorization Endpoint URL in the Authorization Endpoint field.
Put your IdP’s Token Endpoint URL in the Token Endpoint field.
The “Display OIDC Related Artifacts” field is irrelevant since this is an OIDC Flow.
The other fields are not important in this step.
- Scroll down to the “Request Authorization Code” Section.
- Under this section,
The State and Nonce fields are automatically populated.
Add your client’s client identifier to the Client ID field.
Add “http://localhost:3000” to the Redirect URL field.
The string “openid profile” should be automatically populated in the Scope field.
The Resource is needed click the radio button and add an appropriate value.
- Click the Authorize button.
- The browser makes a call to the authorization endpoint. If the user does not have an authenticated session, then the browser is redirected to an authentication workflow.
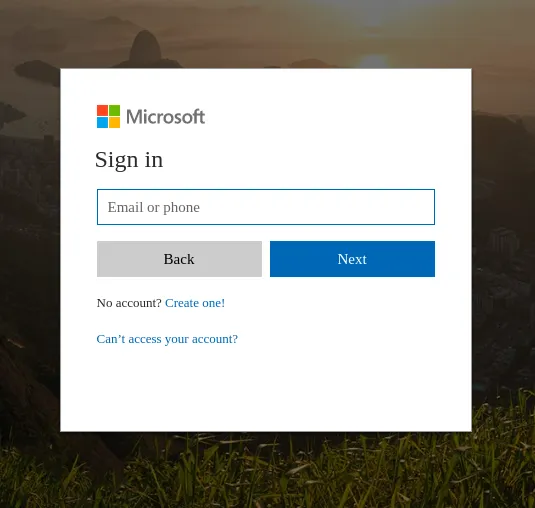
- You will be redirected to the login page for your Identity Provider. If using Azure Active Directory, you will see something similar to the following.
- After successful login, the browser is redirected back to the Redirect URL with an authorization code.
- In the Configuration Section, click the Yes radio button next to “Use Refresh Tokens”.
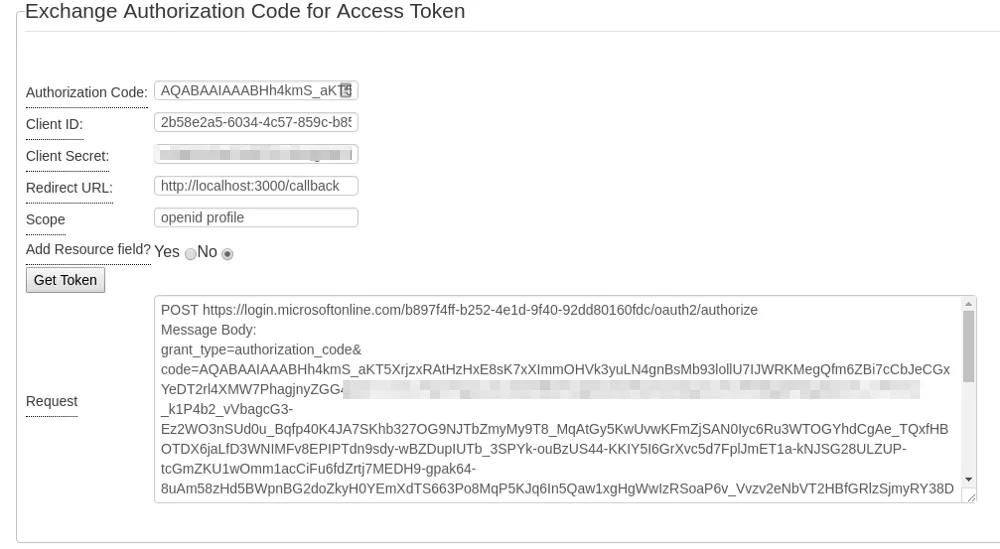
- Scroll down to the “Exchange Authorization Code for Access Token” Section:
The Authorization Code field is automatically populated.
Place your client’s client identifier in the Client ID field.
Place your client’s client secret in the Client Secret field.
Enter the Redirect URL.
Set the scope to “openid profile” or whatever makes sense.
If a Resource parameter is needed, click the Yes radio button and enter a valid value for your IdP.
- You should now have something similar to:
- Click the “Get Token” button.
- After a few moments, the following should be displayed (scroll down):
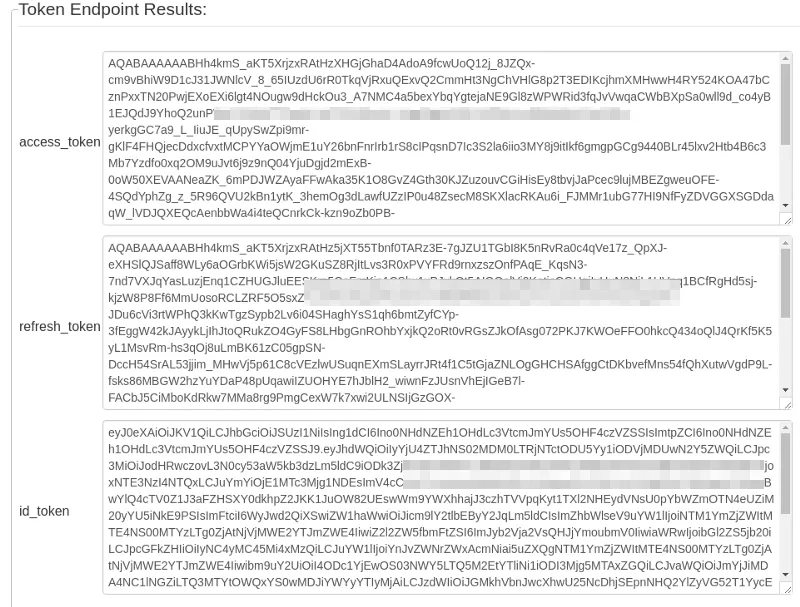
- This gives you the first generation of access token and refresh token.
- If you want to obtain a new access token, make a Refresh Token call to the Token Endpoint. Scroll down to the “Obtain New Access Token Using Refresh Token” Section.
- You will see something similar to the following.
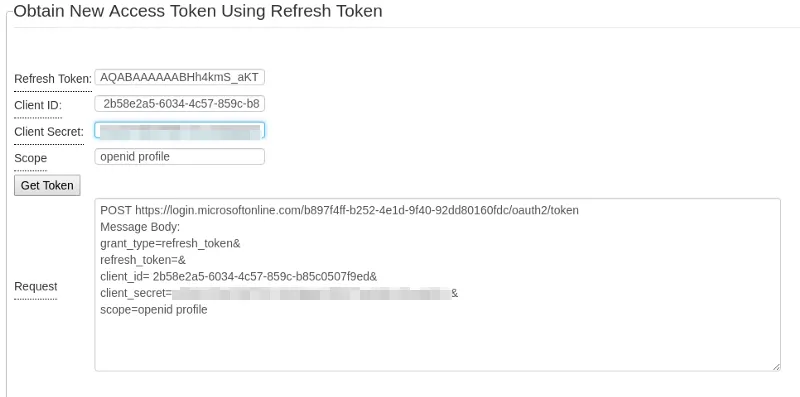
- Enter the following values:
Enter your client’s client identifier in the Client ID field.
Enter your client’s client secret in the client Secret field (if applicable).
Enter “openid profile” in the Scope field.
- Click the “Get Token” button.
- You will see something similar to the following:
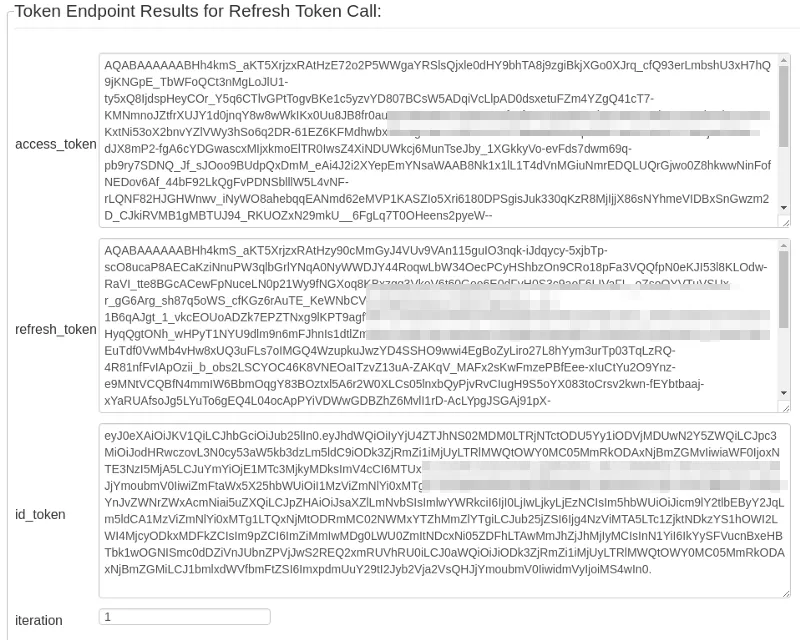
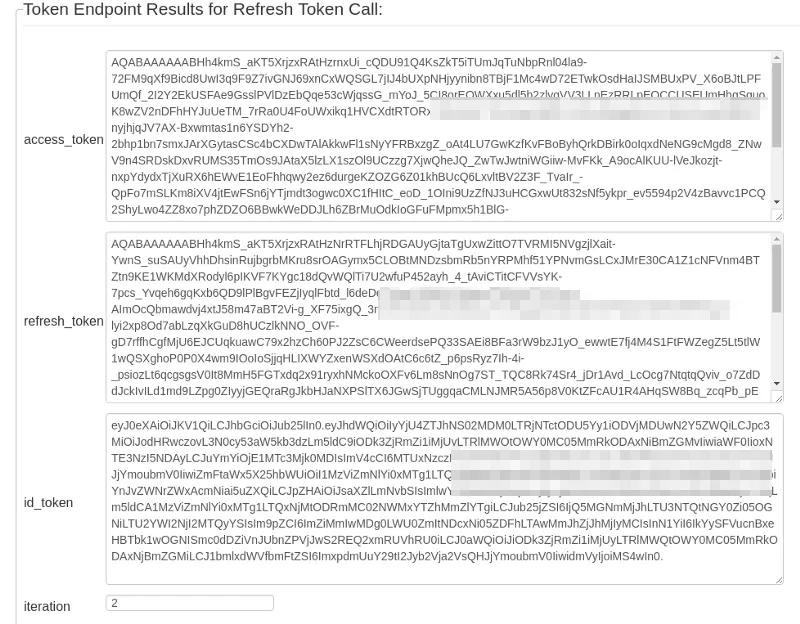
- You can continue to click the “Get Token” button to obtain new access tokens for as long as the Identity Provider will allow it.
There you have it, Refresh Token call support in the OAuth2 + OIDC Debugger.
Image: Patterns — 1 / Stefano Tambalo
Originally published on Medium.